Difference between revisions of "Modbus TCP Server Remap Table Edit"
Jimhogenson (talk | contribs) |
Jimhogenson (talk | contribs) |
||
| Line 11: | Line 11: | ||
'''As remote''' – The remote Modbus register address or number that this local address should be viewed as by remote clients or masters. Follow the same rules for number, address, or Modicon register as for the local value. | '''As remote''' – The remote Modbus register address or number that this local address should be viewed as by remote clients or masters. Follow the same rules for number, address, or Modicon register as for the local value. | ||
<hr> | <hr> | ||
| − | The Add Maps version of the remap edit page works as follows. Let's assume you start with the empty table illustrated below. You click the Add Maps button. | + | The Add Maps version of the remap edit page works as follows. Let's assume you start with the empty table illustrated below. You click the Add Maps button. |
[[File:Modbus server remap table empty.jpg]] | [[File:Modbus server remap table empty.jpg]] | ||
<hr> | <hr> | ||
Revision as of 15:04, 2 May 2019
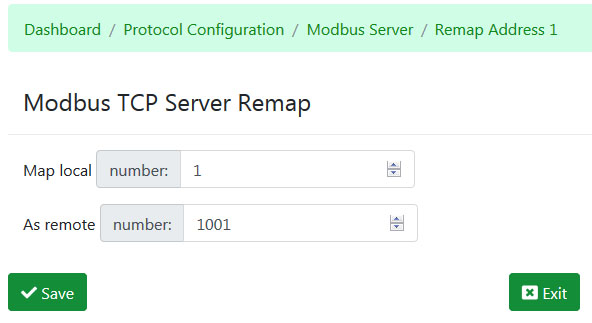
The edit page for server address map is very simple.
Map local will indicate "number", "address", or "Modicon register", depending on your preference which you set under User Settings.
Register Number or Address – Enter the number (starting at 1) or raw address (starting at 0) as applicable. Do NOT enter 40001 for holding register 1 if you have not selected Modicon as the display format in your User Settings.
Modicon Register – Enter numbers like 40001 for the first holding register if you have selected Modicon representation in your User Settings.
As remote – The remote Modbus register address or number that this local address should be viewed as by remote clients or masters. Follow the same rules for number, address, or Modicon register as for the local value.
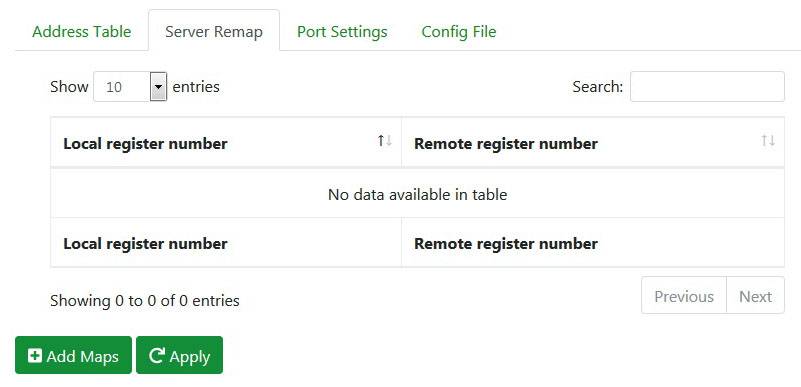
The Add Maps version of the remap edit page works as follows. Let's assume you start with the empty table illustrated below. You click the Add Maps button.

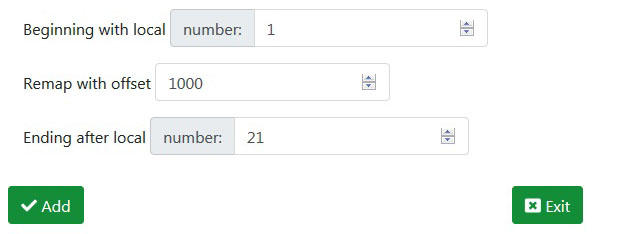
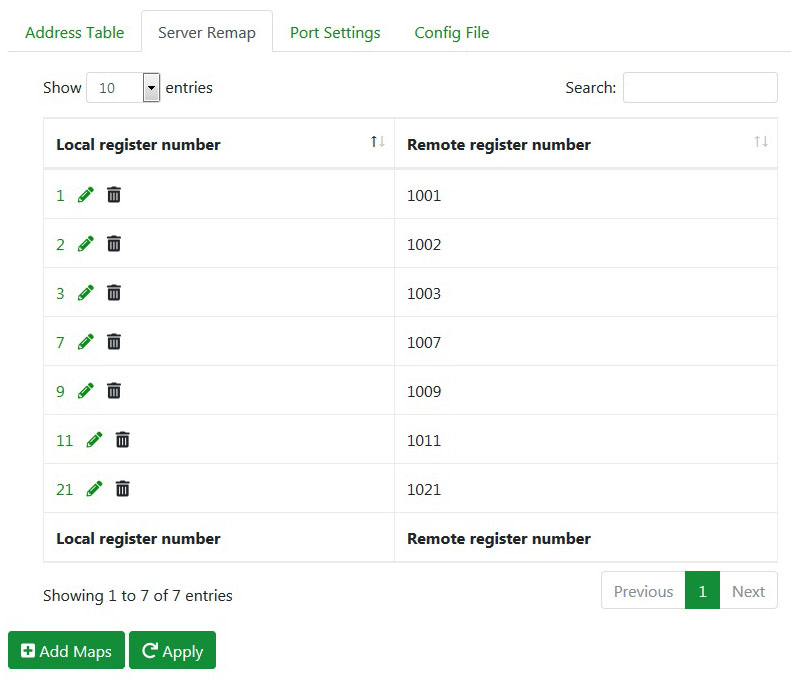
The add/edit page is very simple. Follow the same guidelines for local and remote register numbers. The only difference on the Add page is that you also have an ending number. Click Add to add new entries for the entire range of addresses.


